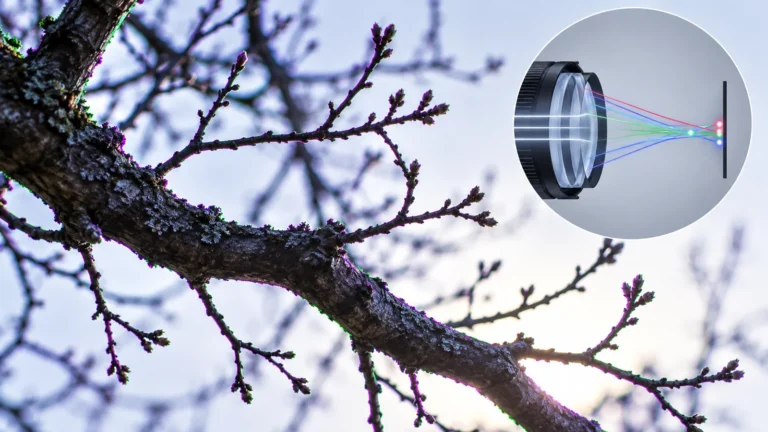
Chromatic aberration is an optical effect in which a lens does not bring different wavelengths of light into perfect agreement in the image. It can appear as colored fringes around strong edges or as focus-related color blur. Real cameras can produce it, so a purple or green outline is not, by itself, evidence of AI generation or deceptive editing.
This guide helps you read a fringe before trying to remove it. You will distinguish two main optical forms, compare their position in the frame, and work through a controlled conceptual example. The exercise is deliberately labeled as an illustration, not a photograph from a tested camera. Its purpose is to practice observation without manufacturing evidence about a particular device or detector.
Recognizing color fringes without jumping to a cause
Start with a simple description. Where does the color appear? Is it a narrow border along a dark branch against a bright sky, a soft halo around a highlight, or a broad colored region? Does it sit outside the object, inside the edge, or on both sides? These observations are more useful than immediately calling every purple pixel chromatic aberration.
A fringe becomes easier to notice when an edge has strong brightness contrast. A dark object against a light background is a helpful place to begin. But the display magnification matters: a tiny colored border enlarged dramatically can dominate a crop even when it is barely visible at normal viewing size. Keep the full image available alongside the close-up so you do not mistake a small optical flaw for a major structural change.
The name describes an optical origin, not a guarantee about every colored edge in a digital file. Other stages of capture and processing can also affect color boundaries. The sensible first conclusion is “a colored fringe is visible,” followed by a hypothesis about its source. That wording leaves room to examine the frame position, focus, capture conditions, and processing history before assigning the cause.
Preserve the strongest available copy. A screenshot can add scaling and compression, and an edited export may already include corrections. If you only have a social-video repost, state that limitation. You can still describe the visible fringe, but you may not be able to reconstruct which part came from the lens and which part came from later processing.
Why a lens can separate colors
A lens bends light to form an image. Its refractive behavior depends on wavelength, so different colors may not form perfectly coincident images. OpenStax explains chromatic aberration in terms of differences in image position and magnification, and describes how combinations of lens elements can reduce it. This is ordinary optics, not a process invented by generative AI. See the optical explanation in College Physics.
The practical idea is easier to follow than the terminology. Imagine drawing the same edge separately in red, green, and blue. If the drawings align, you see one edge. If their sizes or positions differ slightly, a border of color may remain. That is a conceptual analogy for reading an image, not a literal model of every lens, sensor, or correction algorithm.
A camera lens usually contains multiple elements, not one idealized piece of glass. Its design balances several demands, including field coverage, focus, size, and different kinds of image defect. You should not assume that a lens is faulty merely because a demanding scene reveals some residual color fringing. Conversely, you should not assume that a high price or professional label eliminates the need to inspect the actual picture.
For verification, the important point is that an ordinary camera explanation exists. The next question is whether that explanation fits the observed pattern. A fringe near many comparable high-contrast edges suggests a different line of inquiry from an isolated colored boundary around one inserted object. Neither pattern is sufficient alone; each tells you what additional comparison would be useful.
Lateral and longitudinal chromatic aberration
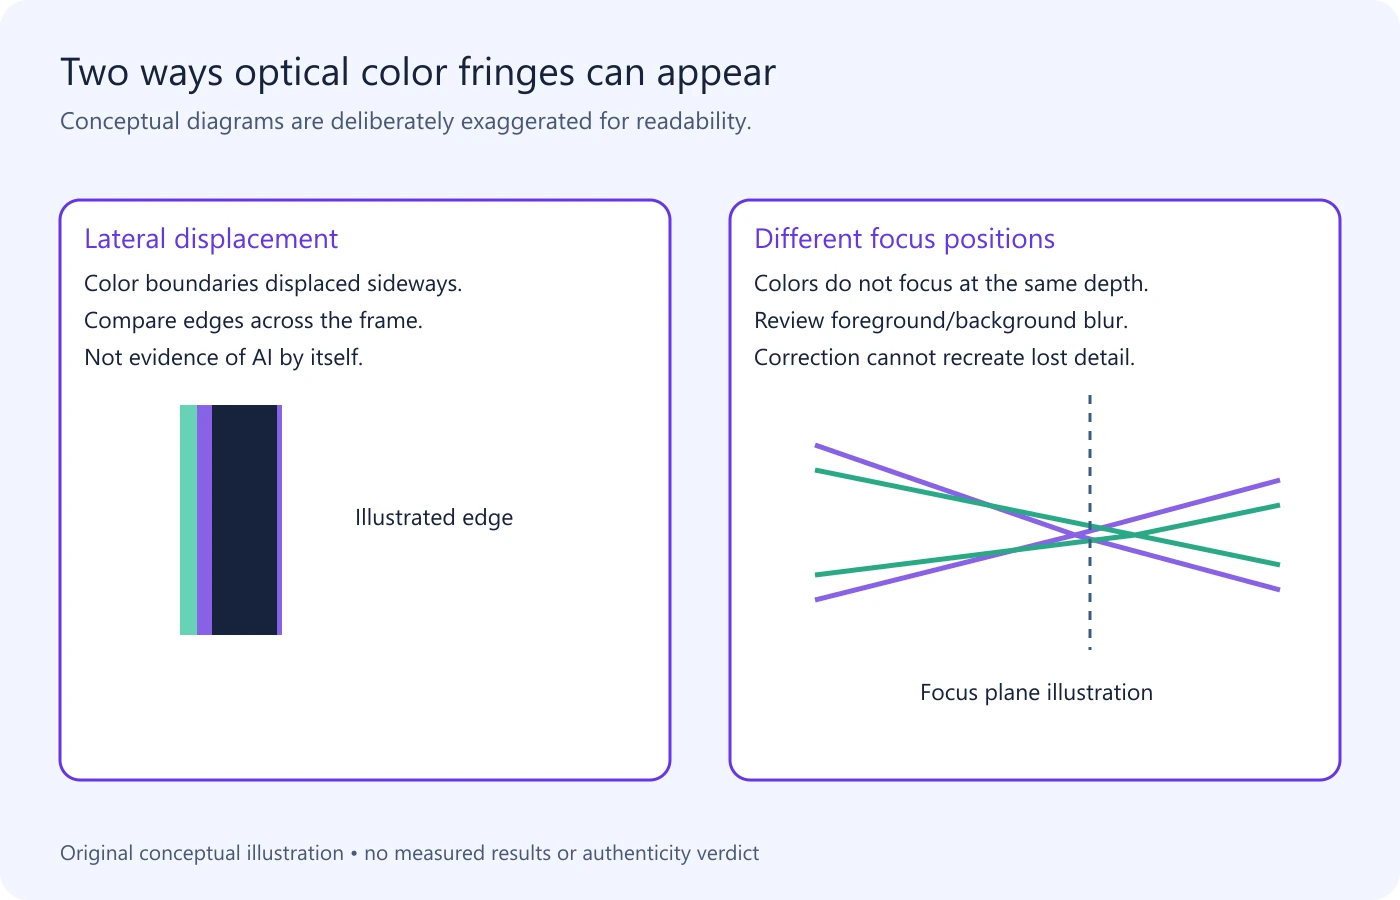
Two names describe different relationships. Lateral chromatic aberration, also called transverse aberration, concerns different color magnifications or positions across the image. Longitudinal or axial chromatic aberration concerns colors coming into focus at different distances along the optical axis. Nikon’s optical guide distinguishes these forms and illustrates the way color fringes can appear in a normal photograph. Read Nikon’s explanation of the two forms.
| Form | Core relationship | Helpful comparison |
|---|---|---|
| Lateral | Color images differ in position or magnification. | Compare similar edges near the center and toward the frame periphery. |
| Longitudinal / axial | Colors do not reach best focus at the same axial distance. | Compare detail around the focus plane with detail in front of or behind it. |
Use these names as a framework, not as labels assigned solely by hue. Purple does not automatically mean one form, and green does not automatically mean the other. The spatial relationship matters. A camera, its lens, scene content, and processing can make a simple color-only rule unreliable.
When reviewing a photograph, compare several features that have similar contrast and focus. If you select only the most dramatic crop, you can miss whether the same behavior appears elsewhere. A corner branch and a central branch, for example, give a useful spatial comparison. A sharp foreground wire and a defocused background light give a different comparison concerned with depth and focus.
A video adds changing focus and composition. The subject may move toward the edge, the lens may refocus, or the background may become more blurred. Observe whether the fringe changes with those conditions. Do not claim that such a relationship proves a specific lens model; many optical systems can share broad behavior.
Read the whole frame before inspecting one edge
The position of a suspicious edge matters as much as its color. Save a full-frame view with the crop location marked in your notes. Then inspect comparable edges at different positions. You are looking for a relationship within the same image, which is usually more informative than comparing unrelated photographs from different cameras.
For a tree against a bright sky, choose a branch near the center, one halfway across, and one close to the edge if the composition provides them. Keep the displayed zoom consistent. Record whether the apparent border grows stronger, stays similar, or becomes impossible to judge because the branches differ in focus or brightness. “Comparison not suitable” is a useful result when the scene does not supply like-for-like features.
Next separate the color border from the underlying shape. Does the dark branch itself maintain a plausible contour? Does the colored margin follow that contour continuously? Or is there an abrupt geometric break unrelated to the rest of the scene? Optical fringing may be one part of a picture that also contains another issue. A plausible explanation for the border does not automatically authenticate every object in the image.
In video, choose moments before and after camera or subject movement. Track the same edge where possible, then compare a different edge under similar conditions. A colored halo that changes because the subject passes out of focus is not the same observation as an object changing identity across frames. Keep the observation narrowly attached to what you actually see.
Focus, aperture, and demanding contrast
Focus and aperture are relevant conditions, especially when inspecting axial effects. Nikon notes that chromatic aberration can be more apparent in images made with wide apertures and discusses reducing aperture as one possible response. That is guidance for assessing or improving capture, not a universal promise that any chosen setting removes every fringe.
If you are making a new illustrative photograph, use a stationary subject and avoid changing several conditions at once. Record what you changed between versions. A comparison that alters the lens, aperture, focus, lighting, and processing simultaneously may look cleaner, but it cannot tell you which change was responsible. For someone else’s unknown image, resist reconstructing settings from appearance alone.
Brightness contrast also changes what is easy to see. A nearly black branch against a bright background may reveal a border more readily than the same branch against foliage. This does not mean the object changed. It means your viewing conditions and the local scene make the difference easier to observe. Preserve that context in the crop instead of removing all the surrounding background.
Be careful with bright clipped highlights. If a file no longer preserves the original highlight detail, correction cannot reconstruct a verified original simply by making the region look neutral. The useful conclusion is that the current copy has limited detail. Where the edge is important, a less processed source or a relevant reference may be more valuable than further adjustment.
For the same reason, distinguish a diagnostic comparison from a pleasing edit. A photograph can be improved aesthetically while becoming less suitable as a record of the unmodified file. Keep the two versions labeled and retain the original for any later review.
Correction can improve appearance without proving authenticity
Adobe Camera Raw documents automatic lateral color correction and manual defringing controls. Its instructions also warn that adjustments can affect actual purple or green objects in the image. This is a useful reminder that removing a colored border requires judgment: a cleaner-looking result does not necessarily preserve every color relationship. See Adobe’s lens-correction guidance.
A cautious practical workflow begins with a duplicate or non-destructive working version. Record the input, the correction used, and the regions inspected afterward. Compare the same area at the same scale before and after. Also look elsewhere in the image for lost color or altered edges. If a correction fixes the branch but damages a violet object, that trade-off should be visible in the notes.
Do not treat a correction tool as an origin detector. Software can remove or reduce a fringe in camera-captured material, an edited composite, or an illustration. Its success answers a limited question about the transformation it applied. It does not establish who made the original, whether a scene happened, or whether a file contains other modifications.
Likewise, a failed correction does not establish synthetic origin. The wrong control, an unsuitable profile, a processed source, or several overlapping artifacts can leave a border behind. If the expected effect is not achieved, return to the pattern and source conditions rather than escalating straight to an AI accusation.
If the picture might matter as evidence, preserve the original and keep the corrected copy visibly identified as a derivative. The video forensics guide discusses why examination and processing records matter. The same general discipline prevents a cosmetic change from being mistaken for discovery of the original scene.
Optical fringing versus compression or editing
Color at an edge is an observation, while optical aberration, compression, and editing are hypotheses about its origin. They can overlap in one file. A camera fringe may survive into a compressed video, then become softer or more conspicuous after resizing. That layered history is why one enlarged screenshot can be insufficient for confident attribution.
Start by checking the geometry of the pattern. Does a thin border track many high-contrast features in related positions? Does the file also contain widespread blocks, smearing, or noisy edge breakup? Is the color attached to one region that behaves differently from comparable objects? Each question selects a more specific next step without pretending that the answer is already known.
This article focuses on optics. When general encoding damage dominates, use the existing compression-artifacts guide for the broader codec-related task. It is better to hand that question to the relevant workflow than to label every halo as a lens defect. When the central concern is an altered or misrepresented scene, the fake-video triage guide addresses source, editing, and context separately.
There is also a possibility that a creator deliberately added a fringe as a visual style. A game, poster, or music video can use color separation for effect. The pixels alone may not tell you whether an optical flaw was captured, simulated, retained intentionally, or intensified in editing. A creator explanation or a source version can be more decisive than an increasingly magnified crop.
A careful conclusion might read: “The colored edge is consistent with an optical or processing effect, but the available repost does not establish its cause.” That is more informative than “purple means fake.” It identifies both what was observed and what the current material cannot support.
A controlled before-and-after reading exercise
Use the following conceptual exercise to practice separating observation, transformation, and conclusion. It uses a hypothetical high-contrast branch, not a real incident or claimed camera test. The accompanying original explanatory visual should be read as a simulation of color displacement and focus relationships, not as evidence that a particular lens behaved this way.
Prepare a bounded comparison
Imagine an unfringed dark branch on a light field. In version A, the colored representations of the edge are slightly displaced sideways. In version B, colored blur is associated with different focus positions rather than a simple sideways shift. In version C, the branch is displayed without the added conceptual effect. Those versions help illustrate relationships; they do not represent measured degrees of aberration.
The control is the unchanged branch shape and background. Keeping that shape constant lets you ask what the added color treatment does to your reading of the edge. If the shape also changes, the exercise introduces another variable. That would be a different comparison and should be labeled as such.
Record observations before reading the labels
For each version, write where the colored region lies relative to the branch and whether it is sharp or diffuse. Then note whether the underlying contour changes. Avoid writing a cause until those fields are complete. This short pause helps prevent a caption such as “AI artifact” from determining every observation that follows.
| Field | What to record |
|---|---|
| Input and region | Source version, crop location, and displayed scale. |
| Border geometry | Inside/outside edge, direction, width description, sharpness. |
| Comparison feature | A second edge with similar focus and contrast. |
| Transformation | Correction or simulation actually applied; no inferred camera setting. |
| Conclusion | What changed, what did not, and which cause remains uncertain. |
Read the corrected version narrowly
Now suppose a correction reduces the visible colored border while the branch geometry remains unchanged. You can report that the applied transformation reduced the border in the working version. You cannot report that it proved the branch was photographed, recovered unknown original detail, or excluded every other edit.
Inspect a naturally colored object elsewhere in the hypothetical frame as a safeguard. If a defringing operation also removes part of that object’s color, the output is not a neutral reconstruction. That observation is useful because it reveals the cost of the correction, not because it establishes a new authenticity verdict.
Finally return to the unmodified version and compare at normal viewing size. Ask whether the correction meaningfully improves readability and whether the crop exaggerated a minor issue. If the original file is the subject of an investigation, keep it as the primary record. The corrected output is a labeled aid for viewing, with the transformation disclosed.
A practical checklist for the next image or clip
- Keep the best available original and record whether the current copy is a screenshot, export, or repost.
- Inspect the full frame and mark the crop location before magnifying it.
- Describe the border’s color, direction, sharpness, and relation to the edge.
- Compare features with similar contrast and focus at different frame positions.
- Separate lateral-position questions from depth-and-focus questions.
- For video, track the same feature through changes in composition and focus.
- Keep optical and processing explanations open when the source cannot distinguish them.
- Label corrected or simulated versions and inspect real colors affected by adjustments.
- Do not turn a removed fringe or a remaining fringe into an authenticity verdict.
When handing the review to someone else, include the exact file version, full-frame reference, crop, and adjustment record. A colleague should be able to repeat the same observation without guessing where you looked. If you could not obtain a comparable edge or a less processed copy, record that as missing evidence. Transparent limits make the review more useful than a confidently named cause unsupported by the source.
For a related video, combine this optical context with source, timing, and available technical evidence. The video metadata guide can help you document the file’s properties without treating a software tag as proof of deception. An edge-reading exercise explains one family of artifacts; it does not replace the wider task of verifying the footage and its claim.
Strange colors are not the whole story.
For a related video, review the original alongside its camera and compression context. Use available technical signals with the source evidence.
Questions about optical color fringing
Does a purple border prove AI generation?
No. Real optical capture and processing can produce colored borders. Describe the pattern and investigate its context before assigning a cause.
Are lateral and longitudinal aberration the same?
No. Lateral effects concern color image position or magnification; longitudinal effects concern different axial focus positions. The distinction is spatial, not simply a color rule.
Can I remove every fringe with one checkbox?
No single control is guaranteed to address every cause or input. Automatic lateral correction and manual defringing address different problems, and strong adjustments may alter genuine colors.
Should I inspect an enlarged screenshot?
It can help you see a pattern, but retain a full-frame reference and note the source quality. Magnification and prior processing can change the impression of an edge.
Does a corrected image become authentic?
No. Correction changes the working image’s appearance. Authenticity requires evidence about origin and modifications, and the corrected version should remain labeled as a derivative.
Sources used
- OpenStax, College Physics, section 26.6: Aberrations. Wavelength-dependent refraction and partial optical correction.
- Nikon, Chromatic Aberration. Axial and lateral forms and capture context. Historical software examples are not treated as current interface instructions.
- Adobe, Correct lens distortions in Camera Raw. Correction controls and cautions about altering real colors.