
A video can be real and still be misleading. It can be edited, cropped, reposted with a false caption, or paired with fake audio. That is why video verification is not just “watching carefully.” It is a repeatable process that helps you confirm what a clip shows, where it came from, and whether the claim attached to it is true.
This guide gives you a practical, step-by-step workflow you can use every day. It is built for real-world situations: viral social posts, WhatsApp forwards, breaking headlines, influencer ads, and short clips with no context. You will also see where Detect AI Video fits in when you suspect manipulation or AI-generated content.
Video Verification: What “Verified” Really Means (and What It Doesn’t)
Verified does not mean “I feel confident.” It means you have checked enough evidence that the clip and its claim are consistent.
When people say “this video is verified,” they usually mean one of these:
- The clip is original and the uploader is credible
- The time and location match the claim
- The clip is not obviously edited, staged, or manipulated
- Other trustworthy sources confirm the same event
- The clip is not AI-generated or altered in a deceptive way
What verification does not mean:
- “The video quality is high, so it must be real”
- “It matches what I already believe”
- “Many people reposted it, so it must be true”
- “Someone said it is real in the comments”
A strong verification result is not a feeling. It is a trail of checks that a third person can follow.
Start Here: The 60-Second Verification Routine (No Tools Needed)
If you only remember one thing from this article, remember this: do the fast routine first. It catches most misinformation without deep analysis.
The 3 Source Questions
- Who posted it first? (original uploader, not the biggest repost)
- What is the uploader’s credibility? (real identity, history, consistency)
- Is there a clean link to the original clip? (not screen-recorded, not re-uploaded 10 times)
The 3 Context Questions
- What is the claim? (exactly what is being suggested)
- What would need to be true for this claim to be real? (place, date, people, event)
- What information is missing? (start of clip, location, audio, longer version)
The quick decision
- Share only if the clip passes source and context checks
- Pause if you cannot verify quickly
- Investigate if the clip is high-impact (politics, money, safety, reputations)
This is how you avoid spreading misinformation while still being fast.
Step 1 – Identify the Original Source (Not the Loudest Repost)
Most viral videos are not original uploads. They are copies of copies, often with edits that remove context or add misleading framing.
How to trace the original upload
Start with the platform where you saw it and work backwards:
- Check if the account credits another source
- Look for earlier posting times (if available)
- Search for the same clip using key phrases from the caption
- Compare versions: the original is often longer and cleaner
Warning signs of an unreliable uploader
- No personal information, no history, reposts only
- Username impersonates news or government accounts
- Bio contains “official” language with no proof
- Comments are restricted or heavily filtered
- The account posts many unrelated “viral” clips per day
If the original source is unknown and the claim is serious, treat it as unverified.
Step 2 – Check the Claim, Not Just the Clip
A real clip can be paired with a false story. This is one of the most common misinformation strategies.
Separate the clip from the caption
Write the claim in one sentence, like this:
“This video shows X happening in Y place on Z date.”
Now ask: what evidence in the clip proves Y and Z? Often the answer is: none.
High-risk claim patterns
- “Breaking news” with no outlet name or link
- “Leaked footage” with no context
- Emotional pressure: “Share before it is deleted”
- Financial pressure: “Buy now,” “invest today,” “last chance”
- Moral pressure: “If you do not share, you support X”
These patterns are common in scam videos and misinformation campaigns.
Step 3 – Validate Time and Location Like a Pro (Without Becoming a Detective)
You do not need advanced skills to do basic geo-time checks. You just need a system.
Location clues you can check fast
- Signs and language: street signs, shop names, writing system
- Landmarks: unique buildings, bridges, mountains
- Vehicles: license plate style, police cars, buses
- Uniforms: police, emergency services, sports teams
- Environment: vegetation, architecture, road markings
Time clues you can check fast
- Weather: is it raining, snowing, foggy, sunny?
- Clothing: winter coats vs summer clothing
- Event timing: does the clip claim something “today” that is clearly old?
Shadow and sun direction (simple but powerful)
You do not need to calculate angles. Just check consistency:
- Are shadows going the same direction for people and objects?
- Does lighting match the environment?
- Does the face lighting match the background lighting?
If these basics do not match, you may be dealing with an edited clip or a misleading claim.
Step 4 – Look for Editing and Manipulation (Even If It’s Not AI)
Not all manipulation is AI. Simple edits can make a video misleading.
Editing red flags
- Hard cuts that remove key context
- Cropped framing that hides important details
- Audio jumps where background sound changes suddenly
- Text overlays that tell you what to think (without proof)
- Speed changes (slow motion or fast motion used to distort meaning)
Also remember: high compression can create artifacts. Do not call something fake because of one glitch. Look for consistent patterns.If you suspect a clip was edited to mislead, treat it like a fake video risk and verify the source and longer version.
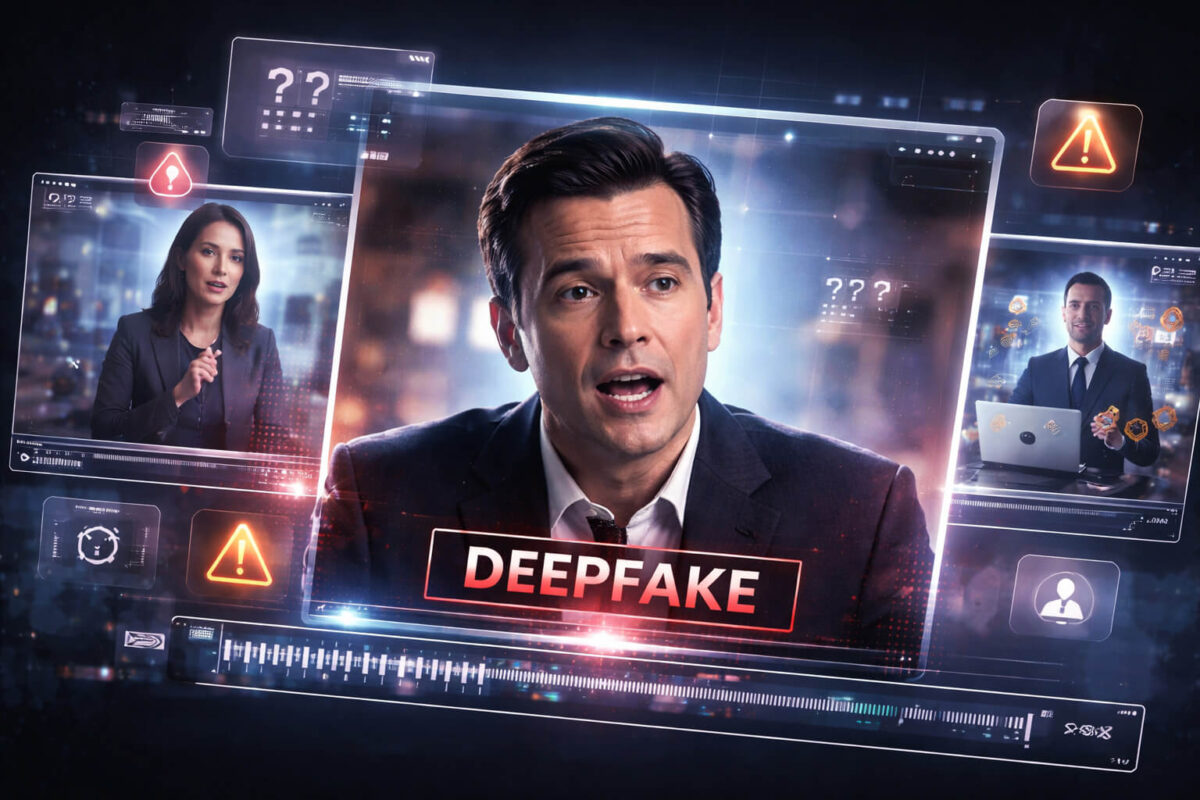
Step 5 – Deepfake and AI Checks (When You Suspect Synthetic Media)
This is where many people get stuck. They zoom in on faces and start guessing. Do not do that. Use a structured scan.
Face checks that work quickly
- Edges around hairline, jawline, and ears flicker or warp
- Skin texture becomes too smooth or inconsistent
- Eye blinking looks unnatural or timed oddly
- Teeth and tongue look unstable across frames
- Lighting on face does not match the room
Audio checks that catch voice manipulation
- Voice sounds “too clean” compared to the environment
- Emotion feels flat or mismatched
- Room echo does not exist, or changes unnaturally
- Mouth movement does not match plosive sounds (p, b, t)
If deepfake risk is high, this is the moment to use Detect AI Video.
Where Detect AI Video fits in
Use Detect AI Video when:
- The clip is going viral and you need a fast confidence signal
- You see mixed signs and want a second layer of checking
- You suspect face manipulation, voice cloning, or synthetic content
- You want to document why a clip looks suspicious
If you want a deeper face-and-audio breakdown, the deepfake video guide covers those signals in more detail.
Step 6 – Find Independent Confirmation (Fast, Without Overthinking)
A verified clip is rarely verified by one piece of evidence. The strongest verification comes from independent confirmation.
What “independent confirmation” means
It means another credible source reports the same event without copying the same viral post.
Examples:
- Trusted news outlets confirm the event
- Official statements from organizations involved
- Multiple videos from different angles
- Multiple unrelated eyewitness accounts that match core facts
Avoid circular proof
A common trap is when many posts cite each other. That is not verification. It is repetition.
If the clip is presented as news, use a news verification approach: check if reliable outlets cover it, and whether the video appears in their reporting.
Step 7 – Document Your Findings (So You Don’t Spread the Clip)
A lot of people spread misinformation while trying to “warn others.” Avoid that.
What to capture instead of reposting
- The original link (not a screen recording)
- The uploader profile page
- Timestamps of suspicious moments
- A short written explanation of your checks
How to warn others safely
Instead of reposting the clip, share:
- “I could not verify the original source.”
- “The caption claims X, but the clip does not prove time or location.”
- “There are signs of editing and no independent confirmation.”
- “I ran it through verification steps and recommend pausing before sharing.”
This protects others without amplifying the content.
Verification Scenarios: Choose Your Path
Verification is easier when you match the method to the scenario.
Scenario A: Viral celebrity clip
- High chance of AI impersonation or edited context
- Check official accounts and multiple sources
- Use Detect AI Video if face or voice seems suspicious
Scenario B: Investment or product ad
- Treat as high-risk by default
- Look for official brand pages
- Reverse-check the claim and look for reports of fraud
- Often overlaps with scam videos patterns
Scenario C: WhatsApp forward from family
- Most common: old clip with a new caption
- Ask: who originally posted it?
- Do not forward it “just in case”
- Consider a dedicated WhatsApp scams guide for these patterns
A Simple Verification Score: Green / Yellow / Red
Use this scoring to make decisions quickly.
Green (safe to share)
- Original source is credible and clear
- Claim matches visible evidence
- Time/location are consistent
- Independent confirmation exists
Yellow (pause and investigate)
- Source is unclear
- Clip is short or heavily cropped
- No independent confirmation
- Some manipulation signs but not conclusive
Red (do not share)
- Strong scam signals or urgency
- Evidence of editing or miscaptioning
- Clear deepfake indicators
- Multiple inconsistencies and no credible source
Most viral videos are Yellow. That is normal.
Conclusion
Video verification is a simple process: trace the original source, separate the claim from the clip, confirm time and location with basic clues, check for editing, then run AI-focused checks when needed. For high-risk or viral clips, combine human judgment with Detect AI Video to flag manipulation signals and avoid spreading misinformation. When you follow a consistent workflow and look for independent confirmation, you can share with confidence and pause when the evidence is not strong enough.
FAQ – Video Verification: Simple Steps to Confirm Real Clips
What is video verification, and why does it matter?
Video verification is the process of confirming whether a clip is authentic and correctly described. It matters because real videos can be reused with false captions, edited to change meaning, or manipulated with AI, which can mislead people and spread misinformation.
How can I verify a video quickly before sharing?
Use a fast routine: identify the original source, check if the caption matches what the video actually shows, and look for basic time and location clues (signs, weather, uniforms, landmarks). If you cannot confirm the source or context in under a minute, pause and investigate further.
Can a video be real but still “fake”?
Yes. A clip can be real footage but shared with the wrong context (wrong place, wrong date, wrong event). This is one of the most common reasons viral videos mislead people, even when the pixels are real.
What are the most common signs a clip was edited or manipulated?
Look for sudden cuts, missing beginnings or endings, cropped framing that hides key details, audio that does not match the environment, and inconsistent lighting or shadows. These signs do not always prove manipulation, but they are strong reasons to verify the original upload and a longer version.
How do I check if a video is AI-generated or a deepfake?
Watch for face and voice mismatches: unstable facial edges, unnatural blinking, inconsistent skin texture, lip-sync issues, and audio that sounds too clean or emotionally flat compared to the scene. If you need a faster confidence signal, use Detect AI Video to analyze the clip for manipulation indicators.
What should I do if I cannot verify a viral video?
Do not repost it “as a warning.” Instead, share a short note without the video, such as: “Original source not confirmed” or “No reliable confirmation of time and location.” If the video could cause harm or fraud, report it on the platform and keep your documentation (source link, timestamps, screenshots).


